1. Article purpose[edit | edit source]
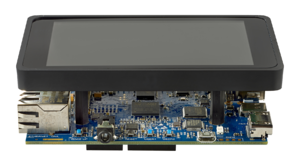
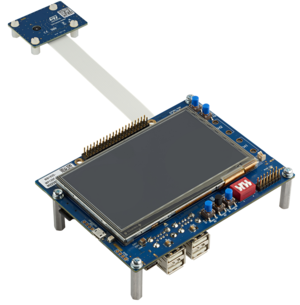
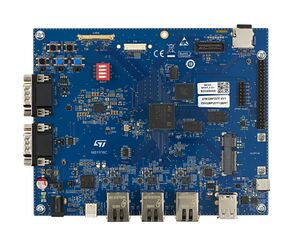
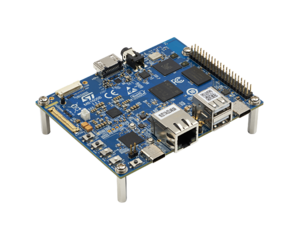
This article explains how to integrate the STPM4RasPI or STPM4RasPIV21 expansion boards with the STM32MP157F-DK2 Discovery kit ![]() , STM32MP135F-DK Discovery kit
, STM32MP135F-DK Discovery kit ![]() , or STM32MP257F-EV1 Evaluation board
, or STM32MP257F-EV1 Evaluation board ![]() . The X-LINUX-TPM OpenSTLinux expansion package provides the software add-ons for this integration.
A signature verification use case is included to verify the TPM integration.
. The X-LINUX-TPM OpenSTLinux expansion package provides the software add-ons for this integration.
A signature verification use case is included to verify the TPM integration.
Multiple services are available using TPM (mostly on PC and mobile devices):
- Generation, protection, management, and use of cryptographic keys
- Cryptographic device identity
- Secure logging, log reporting, and certification or authentication
- Secure non-volatile storage
- Other functions including hashing, random number generation, and secure clock
Several use cases are available:
- Platform integrity: The boot process relies on TPM for software integrity and authentication during each boot stage
- Disk encryption: Drive encryption and decryption using the TPM crypto core
- Password protection and others
The use case described in this article uses the cryptographic key generation functionality on the TPM.
2. Prerequisites[edit | edit source]
2.1. Hardware prerequisites[edit | edit source]
For more information on the STM32 discovery or evaluation boards and how to start them up, refer to the sections Getting started with STM32MP157x-DK2, Getting started with STM32MP135x-DK, Getting started with STM32MP257x-EV1 or Getting started with STM32MP257x-DK.
- STPM4RasPI extension board[1]
- STPM4RasPIV21 extension board[2]
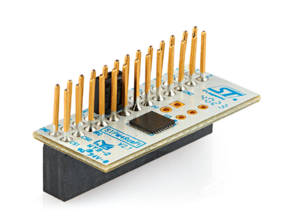
STPM4RasPI and STPM4RasPIV21 are extension boards to connect STSAFE-TPM products to the STM32 microprocessor development kits such as STM32MP157F-DK2 or STM32MP135F-DK. The boards are designed for product evaluation, use case development, and integration activities. The boards are shipped with one trusted platform module soldered.
- STPM4RasPI is the extension board to connect ST33TPHF2XSPI or ST33TPHF2XI2C products. Refer to the board webpage for ordering information (https://www.st.com/en/evaluation-tools/stpm4raspi.html).
- STPM4RasPIV21 is the extension board to connect the ST33KTPM2X or ST33KTPM2I products. Refer to the board webpage for ordering information (https://www.st.com/en/evaluation-tools/stpm4raspiv21.html).
2.2. Software prerequisites[edit | edit source]
- Be familiar with OpenSTLinux Distribution Package. Refer to the STM32MPU Distribution Package article for more information.
- Get the OpenSTLinux ecosystem release v6.0.0
 (steps described in the article above).
3. Hardware setup[edit | edit source]
Each discovery boards and evaluation boards offer a 40-pin connector, also called a Raspberry Pi® connector. To setup your hardware, plug the STPM4RasPI or STPM4RasPIV21 extension board on this connector (the small "1" marking indicates the correct orientation of the connector).
4. Software setup[edit | edit source]
X-LINUX-TPM is an STM32 MPU OpenSTLinux expansion package that aims to bring the support of STPM4RasPI[3] expansion board into the OpenSTLinux distribution.
This package is provided as a Yocto meta-layer and can be applied directly in the OpenSTLinux distribution.
| This version is compatible with the Yocto Project® build system Scarthgap. It is validated against the OpenSTLinux ecosystem release v6.0.0 |
4.1. Main software modification[edit | edit source]
Through the Yocto-meta layer delivered by this package, changes are applied to the OpenSTLinux distribution mainly at two levels:
- The Linux® kernel: at kernel configuration and device tree level.
- User space: by providing the necessary libraries and tools to use the TPM extension board features.
4.1.1. Linux kernel configuration[edit | edit source]
To activate and use the right TPM SPI and I2C drivers, X-LINUX-TPM changes the Linux kernel configuration as follows:
CONFIG_TCG_TPM=y
CONFIG_TCG_TIS=y
CONFIG_TCG_TIS_SPI=y
CONFIG_TCG_TIS_I2C=y
CONFIG_CRC_CCITT=y
4.1.2. Linux kernel board device trees[edit | edit source]
On discovery boards mentioned in this article, both Raspberry PI connectors are linked with SPI5 provided by the STM32 device. This is the SPI instance that is used to access TPM features.
In the same way, some other TPM chips are controlled via the I2C interface. In this situation, the I2C5 instance is used on the Raspberry PI connector.
Note that some TPM devices can support both the SPI and I2C interfaces.
Therefore, the board device trees are patched into the X-LINUX-TPM to get the following SPI and I2C nodes:
- arch/arm/boot/dts/st/stm32mp157f-dk2.dts Device Tree Source file:
&spi5{
	pinctrl-names = "default", "sleep";
	pinctrl-0 = <&spi5_pins_a>;
	pinctrl-1 = <&spi5_sleep_pins_a>;
	cs-gpios = <&gpiof 6 0>;
	status = "okay";

	st33htpm0: st33htpm@0{
		status="okay";
		compatible = "st,st33htpm-spi";
		#address-cells = <1>;
		#size-cells = <0>;
		reg = <0>; /* CS #0 */
		spi-max-frequency = <10000000>;
	};
};
&i2c5 {
	pinctrl-names = "default", "sleep";
	pinctrl-0 = <&i2c5_pins_a>;
	pinctrl-1 = <&i2c5_sleep_pins_a>;
	i2c-scl-rising-time-ns = <185>;
	i2c-scl-falling-time-ns = <20>;
	clock-frequency = <400000>;
	/* spare dmas for other usage */
	/delete-property/dmas;
	/delete-property/dma-names;
	status = "okay";

	st33htpi: st33htpi@0{
		compatible = "infineon,slb9673", "tcg,tpm-tis-i2c";
		reg = <0x2e>;
		status="okay";
	};
};
- arch/arm/boot/dts/st/stm32mp135f-dk.dts Device Tree Source file:
&spi5{
	pinctrl-names = "default", "sleep";
	pinctrl-0 = <&spi5_pins_a>;
	pinctrl-1 = <&spi5_sleep_pins_a>;
	cs-gpios = <&gpioh 11 0>;
	status = "okay";

	st33htpm0: st33htpm@0{
		status="okay";
		compatible = "st,st33htpm-spi";
		#address-cells = <1>;
		#size-cells = <0>;
		reg = <0>; /* CS #0 */
		spi-max-frequency = <10000000>;
	};
};
&i2c5 {
	pinctrl-names = "default", "sleep";
	pinctrl-0 = <&i2c5_pins_a>;
	pinctrl-1 = <&i2c5_sleep_pins_a>;
	i2c-scl-rising-time-ns = <170>;
	i2c-scl-falling-time-ns = <5>;
	clock-frequency = <400000>;
	status = "okay";
	/* spare dmas for other usage */
	/delete-property/dmas;
	/delete-property/dma-names;

	st33htpi: st33htpi@0{
		compatible = "infineon,slb9673", "tcg,tpm-tis-i2c";
		reg = <0x2e>;
		status="okay";
	};
};
- arch/arm64/boot/dts/st/stm32mp257f-ev1.dts Device Tree Source file:
&spi3 {
	pinctrl-names = "default", "sleep";
	pinctrl-0 = <&spi3_pins_a>;
	pinctrl-1 = <&spi3_sleep_pins_a>;
	status = "okay";

	cs-gpios =  <&gpiob 1 0>;

	st33htpm0: st33htpm@0{
		status="okay";
		compatible = "st,st33htpm-spi";
		#address-cells = <1>;
		#size-cells = <0>;
		reg = <0>; /* CS #0 */
		spi-max-frequency = <10000000>;
	};
};
&i2c8 {
	pinctrl-names = "default", "sleep";
	pinctrl-0 = <&i2c8_pins_a>;
	pinctrl-1 = <&i2c8_sleep_pins_a>;
	i2c-scl-rising-time-ns = <57>;
	i2c-scl-falling-time-ns = <7>;
	clock-frequency = <400000>;
	status = "okay";
	/* spare dmas for other usage */
	/delete-property/dmas;
	/delete-property/dma-names;

	st33htpi: st33htpi@0{
		compatible = "infineon,slb9673", "tcg,tpm-tis-i2c";
		reg = <0x2e>;
		status="okay";
	};
};
The cs-gpios property for SPI is schematics-dependent as it must target the SPI5_NSS pin. Other SPI5 pins are defined by pinctrl nodes.
The reg property for I2C represents the I2C address of the TPM device.
4.1.3. User space additional stacks[edit | edit source]
The X-LINUX-TPM package provides the TPM2 software stack (TSS) [4] into the OpenSTLinux distribution. It deals with TSS libraries as well as tpm2-tools. The latter are used to handle the TPM. The diagram below gives an overview of the software architecture, in the context of such an SPI-controlled device.
4.2. How to build the OpenSTLinux distribution with X-LINUX-TPM[edit | edit source]
With the following procedure, the complete distribution is regenerated by enabling the X-LINUX-TPM expansion package.
4.2.1. Download the STM32MPU Distribution Package[edit | edit source]
For ecosystem release v6.0.0 ![]() :
:
Install the STM32MPU Distribution Package.
4.2.2. Install the X-LINUX-TPM environment[edit | edit source]
- Add the Yocto Layer meta-security into your environment (it provides TPM2 recipes):
cd <Distribution Package installation directory>/layers
git clone https://git.yoctoproject.org/meta-security -b scarthgap
cd ..
- Clone the meta-st-x-linux-tpm git repository:
cd <Distribution Package installation directory>/layers/meta-st
git clone -b yocto/scarthgap https://github.com/STMicroelectronics/meta-st-x-linux-tpm.git
cd ../..
- Source the build environment (MACHINE value depends on the series you use):
DISTRO=openstlinux-weston MACHINE=<stm32mpX> source layers/meta-st/scripts/envsetup.sh
bitbake-layers add-layer ../layers/meta-st/meta-st-x-linux-tpm
4.2.3. Build the image[edit | edit source]
bitbake st-image-weston
| Note that building the image might take a long time depending on the host computer performance. |
4.2.4. Program the built image into the flash memory[edit | edit source]
Follow this link to see how to program the built image.
4.3. How to validate the proper behavior of X-LINUX-TPM[edit | edit source]
You can find below some ways of checking that the TPM2 features are working properly.
4.3.1. Driver load checking[edit | edit source]
When the TPM driver is loaded, /dev/tpm0 and /dev/tpmrm0 are present, as shown in the example below.
dmesg | grep tpm
[ 1.525447] tpm_tis_spi spi0.0: 2.0 TPM (device-id 0x0, rev-id 78)
ls -l /dev | grep tpm
crw------- 1 tss  tss    10,   224 Oct 11 15:27 tpm0
crw------- 1 root root  253, 65536 Oct 11 15:27 tpmrm0
4.3.2. Simple TPM tool command checking[edit | edit source]
If the driver is loaded successfully, you can test it by running a simple 'tpm2' command in the Linux kernel console:
tpm2_getrandom --hex 20
If no error is raised, it means that the STM32 device is communicating properly with the STPM4RasPI or STPM4RasPIV21 extension board.
5. How to run a signature use case with X-LINUX-TPM[edit | edit source]
This is an example showing how to use the TPM to perform the signature of a file "msg.txt" hash (digest). A verification is done with the openssl "dgst -verify" command.
Message creation example:
echo dzeydezyetrefygzuedghdgie > msg.txt
Primary key creation:
tpm2_createprimary -C o -c pri.txt
Signature key creation:
tpm2_create -C pri.txt -g sha256 -G rsa -u kpub.bin -r kpriv.bin
Loading of the created signature key in TPM:
tpm2_load -u kpub.bin -r kpriv.bin -C pri.txt -c key.txt
Signature of the hash with the TPM signed key:
tpm2_sign -c key.txt -g sha256 -f plain -o hash.plain msg.txt
Read of the public part of the TPM signing key:
tpm2_readpublic -c key.txt -f der -o key_sig_pub.der
Verification with openssl dgst:
openssl dgst -verify key_sig_pub.der -keyform der -sha256 -signature hash.plain msg.txt
6. References[edit | edit source]
