This article is a guideline to OP-TEE trusted application support, which is fully integrated from release 1.10.0.22 of STM32CubeIDE.
It proposes to create an OP-TEE trusted application project implementing:
- user space executable hello world which makes a call to OP-TEE trusted application
- OP-TEE trusted application itself, with universally unique identifier (a.k.a. UUID) support
1. Prerequisites[edit | edit source]
Minimum hardware
- STM32MP1x board booted with OP-TEE
- Linux console
- Ethernet (or Ethernet over USB) for connection to Linux® Cortex®-A
Minimum software
- STM32CubeIDE v1.10.0.22 installed and
- STM32MP15 project created
- Yocto SDK installed thanks to "Setup OpenSTLinux", root project contextual menu
- Linux project imported thanks to "Import an OpenSTLinux project", root project contextual menu
Yocto SDK is required to built trusted application example and Linux project is used here only to deploy trusted application on the STM32MP1x target.
2. Create a Trusted Application project[edit | edit source]
In the root project context, named "myMp135fDk" here, right-click and select Create an OP-TEE Trusted Application Project.
Project name is given, note that the trusted application project uses by default the SDK version associated to the STM32MP1 project (OpenSTLinux 4.0.0 in this STM32CubeIDE 1.10 version).
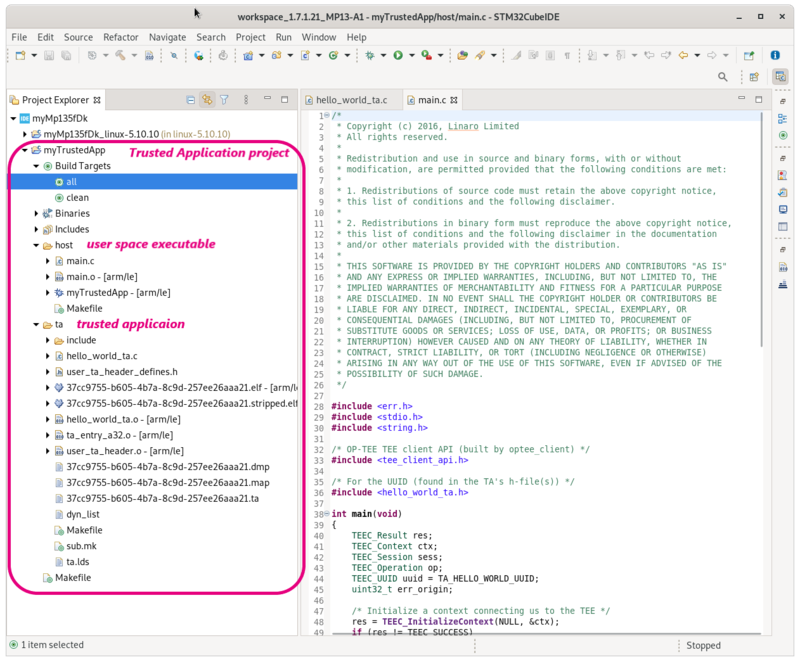
Trusted Application type project is created under root project. It contains two repositories for sources:
- "host/", which targets user space executable sources
- and "ta/" corresponding to trusted application sources
3. Build[edit | edit source]
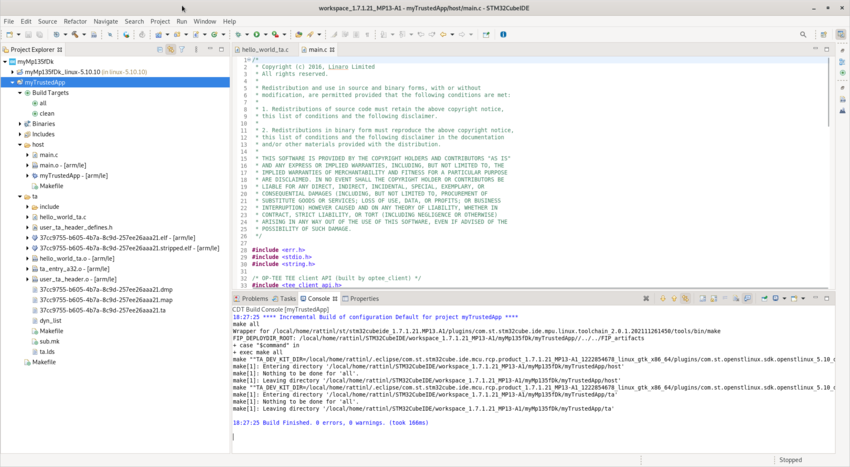
Select your trusted application project, right-click and then Build Project.
This build generates two objects:
- the executable, "myTrustedApp" here under "Binaries/" Eclipse artifact
- the trusted application, "37cc9755-b605-4b7a-8c9d-257ee26aaa21.ta" under "ta/" repository.
64-bit support
ENV?= "TA_DEV_KIT_DIR=$(SDKTARGETSYSROOT)/usr/include/optee/export-user_ta_arm64 LIBGCC_LOCATE_CFLAGS=--sysroot=$(SDKTARGETSYSROOT) TEEC_EXPORT=$(SDKTARGETSYSROOT)/usr"
$(MAKE) "$(ENV)" -C ta CFLAGS=--sysroot="$(SDKTARGETSYSROOT)" CROSS_COMPILE="$(TA_CROSS_COMPILE)" LDFLAGS=""
4. Preparing debug[edit | edit source]
In order to debug user space application, your target must be Linux® booted and network connected.
You can check boot messages via Linux® console opened with butterfly icon, but remember this console cannot be shared outside STM32CubeIDE (minicom,...).
In order to check network connection, start the Target Status widget in the bottom right corner of the window.
Check also How to set up proxy and P2P Ethernet connection with STM32CubeIDE if you are in that case.
5. Linux® deployment configuration[edit | edit source]
To run or debug the executable "myTrustedApp", it is required to download the trusted application (.ta) to the STM32MP1 device.
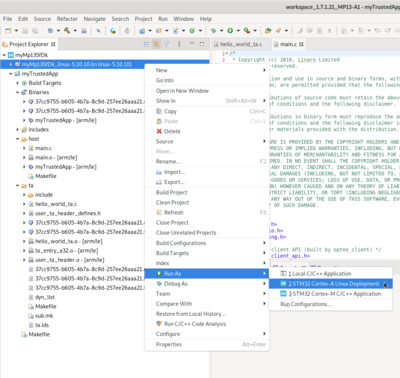
Select the Linux project, right-click Run as... > Run Configurations, then select STM32 Cortex-A Linux Deployment'.
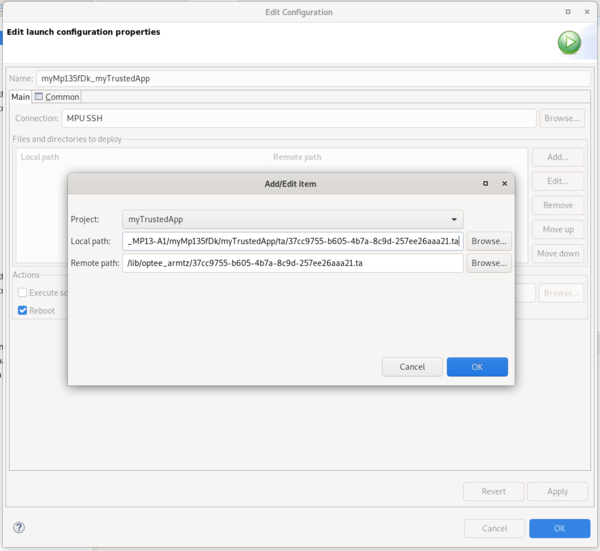
Setup for trusted application are:
- select as Project the trusted application project, "myTrustedApp" here
- select as Local path the .ta file inside ta/ of trusted application project
- select as Remote path "/lib/optee_armtz/"
Then unclick reboot and click OK, you will get the corresponding deployment message in a dedicated console.
6. Debug Configuration[edit | edit source]
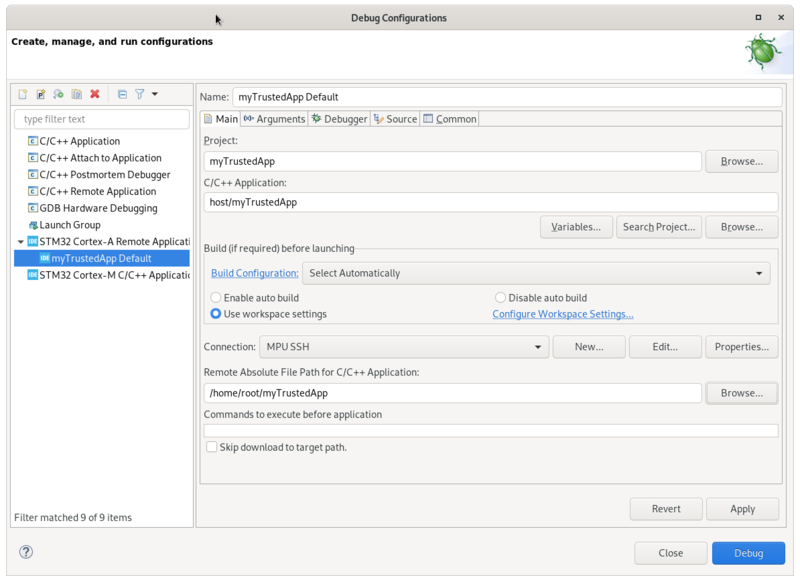
Select your trusted application project, right-click Debug as... > Debug Configurations, then select STM32 Cortex-A Remote Application > New Configuration...'.
Setup C/C++ Application with Search Project... and select the executable.
The default connection proposed is "MPU SSH", corresponding to the target IP address discovered by the Target Status widget. The default destination directory is /home/root.
7. Debug: stepping into myTrustedApp[edit | edit source]
Click Debug :
- Executable is downloaded to the target,
- GDBServer is launched on the target,
- GDBClient is launched on the workstation and can exchange via the network with GDBServer.
Stepping into trusted application source code, we reach the call to the trusted application on line 86. The increment is done by OP-TEE trusted application as mentioned in the console.
Note that debug of trusted application itself (.ta) is not supported.
64-bit SDK set-up
Launching debug
| In case of error; stop any GDBServer running on the target before launching a new debug session. |


