1. Import an SW4STM32 project with an ioc file[edit | edit source]
If the project already contains an ioc file, the easiest way to import the project into a working STM32CubeIDE environment is to copy it and open the copy through STM32CubeMX stand alone, then, in the Project Manager, change the Toolchain / IDE to STM32CubeIDE and regenerate the project.
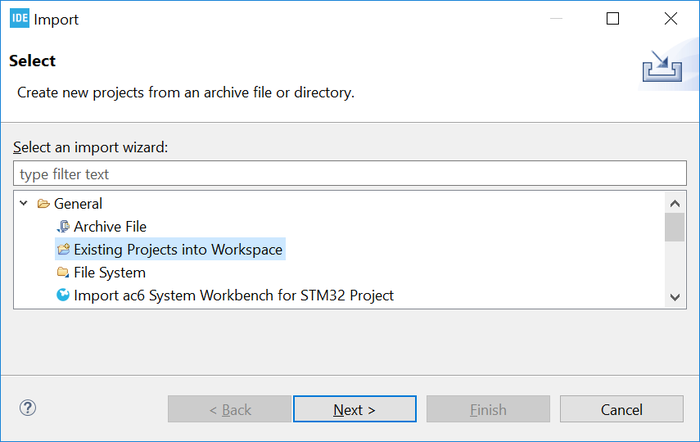
After the project is regenerated, go to [File]>[Import...] and choose to import it as an Existing projects into Workspace.
Then copy the code inside the different /* USER CODE BEGIN */ blocks that exist in the project into the new STM32CubeIDE environment.
2. Import an SW4STM32 project without an ioc file[edit | edit source]
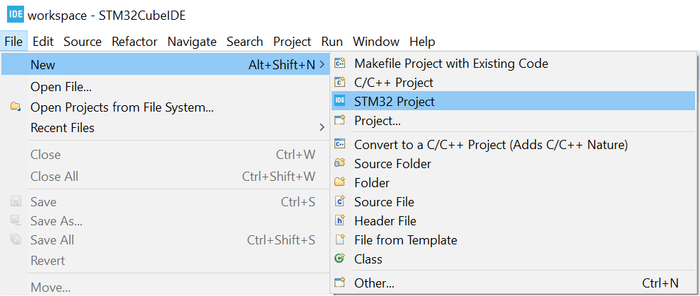
To make sure that the project gets a hierarchical structure, the recommended way is to go to [File]>[New]>[STM32 Project] as shown below.
Select the device for the project being imported and click on [Next >].
When setting up the project as shown below, make sure the Targeted Project Type is set to Empty and click on [Finish].
After the empty hierarchical project is generated:
- Go to [File]>[Import...]
- Import the SW4STM32 project as Import ac6 System Workbench for STM32 Project
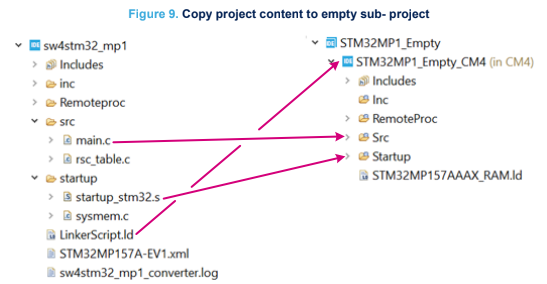
- Copy and paste the project content into the sub-project of the empty project by means of STM32CubeIDE project explorer as shown below
| It is not recommended to import the .cproject, .project or .settings files. |
It is important to remember to configure also the same build settings used previously while the project was in the SW4STM32 environment. If the project contains linked resources, they must be updated to point to the correct resources in the file system. This process is necessary because importing a project made for SW4STM32 without any special treatment and without an ioc file results in a flat project structure in STM32CubeIDE.


