1. Presentation
This page describes how to easily build and install an STM32WBA Zigbee application.
Project examples for different platforms are available in the STM32CubeWBA MCU package[1].
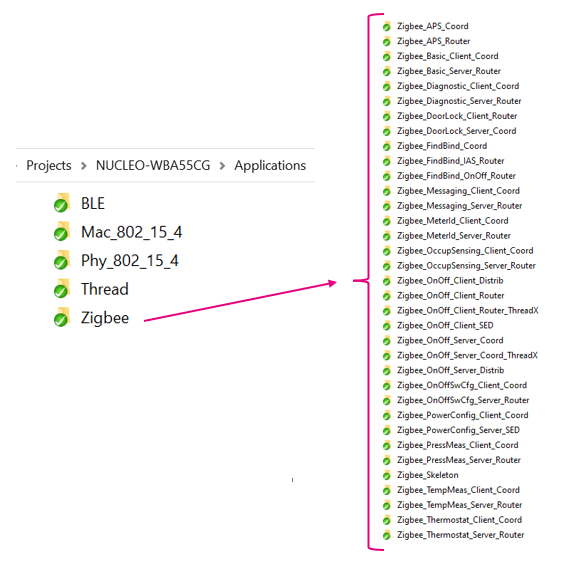
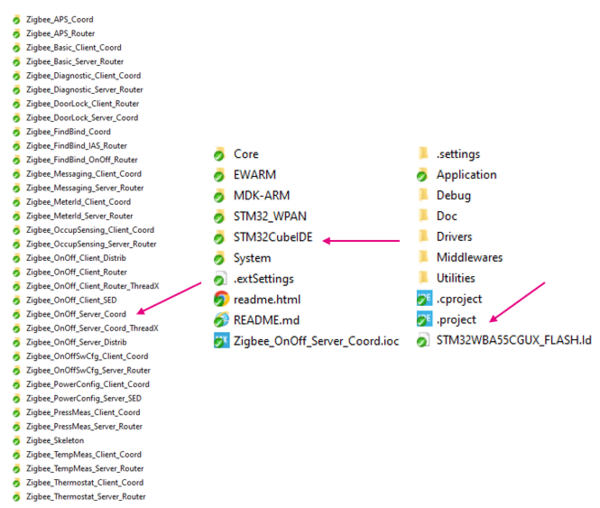
The figure below shows an example of the STMicroelectronics Zigbee project structure.
| STMicroelectronics Zigbee project example directory |
|---|
2. Requirements
2.1. Software requirements
The following software is required:
Minimum IDE versions:
- IAR Embedded Workbench® for Arm® (EWARM) toolchain V9.20.1, plus a patch available in the WBA firmware package (STM32Cube_FW_WBA_Vx.x.x/Utilities/PC_Software/EWARMv8_STM32WBAx_V1.2.zip)
- RealView microcontroller development kit (MDK-ARM) toolchain V5.37, plus a patch available in the WBA firmware package (STM32Cube_FW_WBA_Vx.x.x/Utilities/PC_Software/Keil.STM32WBAx_DFP.1.0.0.zip)
- STM32CubeIDE toolchain V1.12.0[2]
Required programmer version:
- STM32CubeProgrammer[3], required to program the board with a previously generated binary file.
2.2. Hardware requirements
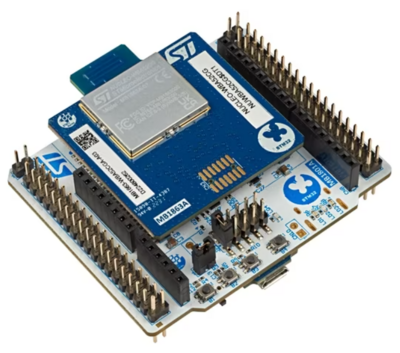
A Nucleo board[4], as illustrated in the figure below, is necessary to install the application.
| Nucleo-WBA52CG board |
|---|
3. Build and install the application
This section describes the build process using IAR Embedded Workbench® and STM32CubeIDE.
3.1. IAR IDE
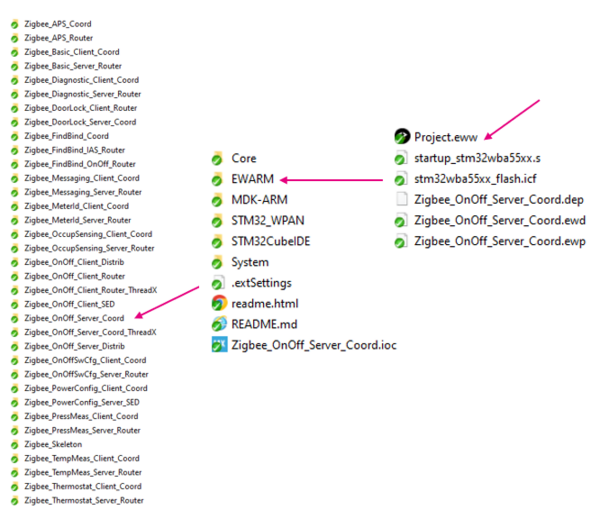
Select the application that you want to build, open the dedicated IAR IDE (EWARM) directory, and launch Project.eww to open the demonstration project in the IDE.
| IAR project directory |
|---|
Ensure that your project is correctly visible in the project explorer view.
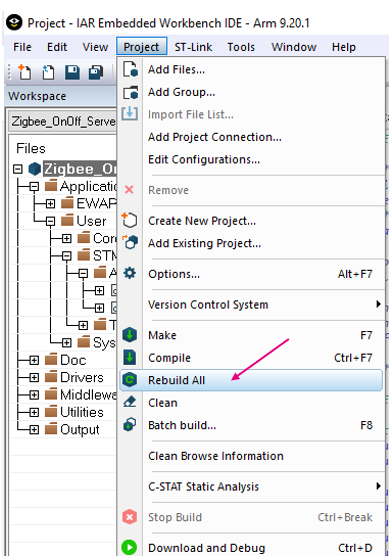
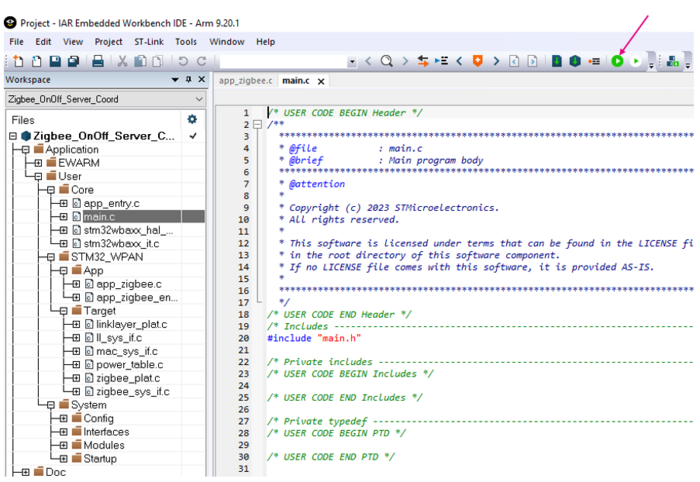
Then either build your project or build it and program the board with it, as illustrated by the figures below.
| IAR: build the application |
|---|
| IAR: build and program the application onto the board |
|---|
3.2. STM32CubeIDE
Select the application you want to build and open the dedicated STM32CubeIDE directory. Launch the STM32CubeIDE, and select the .project folder of the demonstration.
| STM32CubeIDE project folder |
|---|
Ensure that your project is correctly visible in the project explorer view.
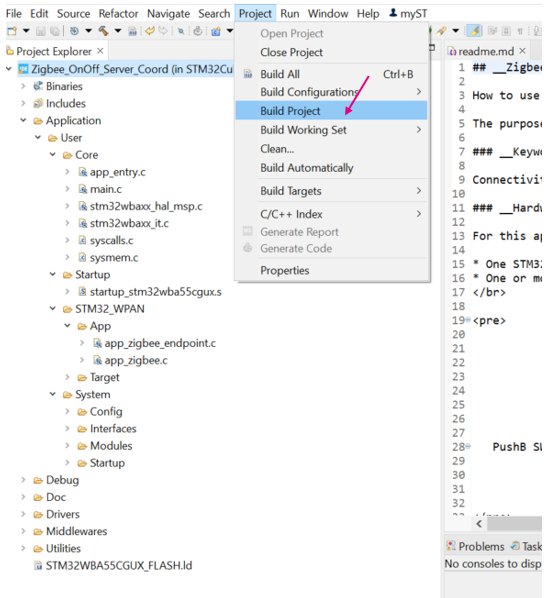
Then build your project, as illustrated by the figure below.
| STM32CubeIDE: build the application |
|---|
After building, program the board with the application:
| STM32CubeIDE: program the application onto the board |
|---|
3.3. Install the application with STM32CubeProgrammer
It is possible to program the previously built binary, whether with IAR Embedded Workbench® or STM32CubeIDE, by using STM32CubeProgrammer[3].
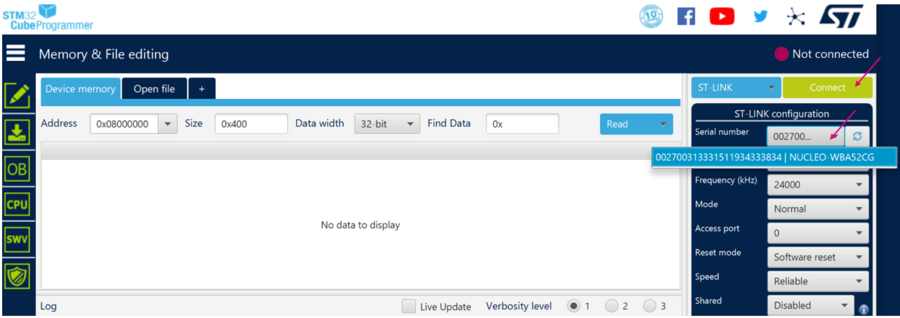
Open the tool, select your device, and connect to it:
| STM32CubeProgrammer: platform connection |
|---|
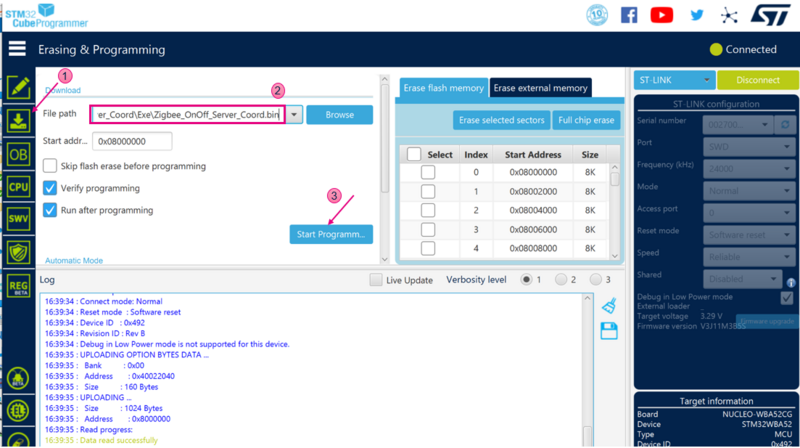
Once connected, the device information is displayed in the STM32CubeProgrammer interface. Click on the programming icon in the left column and select the project binary to program:
- STM32Cube_FW_WBA_V[...]\Projects\[...]\Applications\Zigbee\Zigbee_OnOff_Server_Coord\[...]\Zigbee_OnOff_Server_Coord.bin
Set the start address to 0x08000000 and click on the Start programming button, as illustrated by the figure below.
| STM32CubeProgrammer: programming the project |
|---|
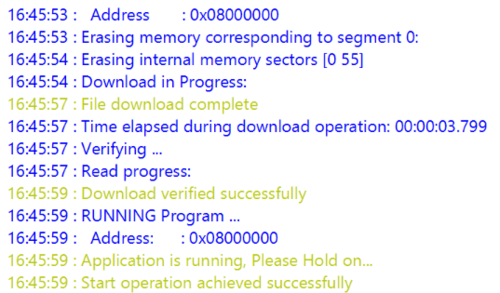
When programming is complete, STM32CubeProgrammer displays the following logs:
| STM32CubeProgrammer: programming logs |
|---|
4. References
