1. Presentation
This page describes how to easily build and install STM Bluetooth® LE example application.
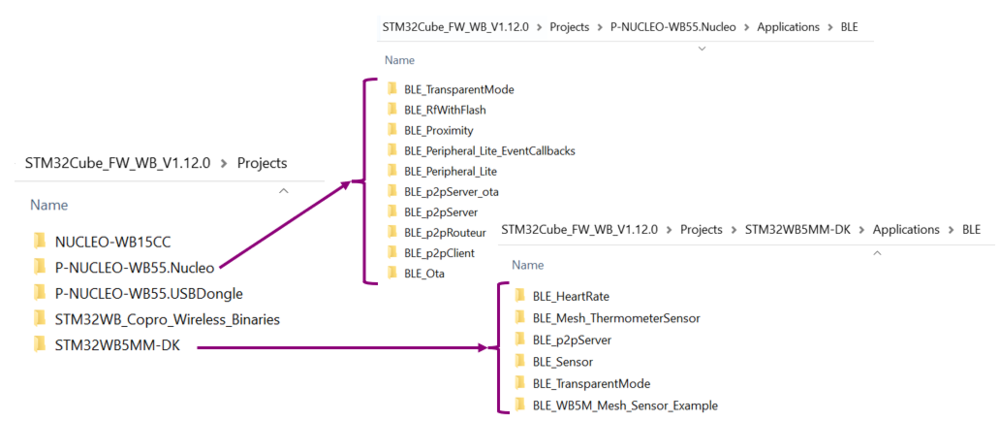
Example projects can be found on STM32CubeWB MCU Package[1], and are available for different platforms.
| ST Bluetooth® LE example project directory |
|---|
Some of the following information can be retrieved from Building wireless applications with STM32WB Series microcontrollers, application note[2].
2. Requirements
2.1. Software and system requirements
The software required are as follows:
minimum IDEs version:
- IAR embedded workbench for ARM (EWARM) toolchain V9.20.1
- RealView microcontroller development kit (MDK-ARM) toolchain V5.31
- STM32CubeIDE toolchain V1.11.0 [3]
Programmer:
- STM32CubeProgrammer[4]: to flash the board with an already generated binary
2.2. Hardware requirements
One of the following boards is necessary to install the application:
- B-WB1M-WPAN1 [5]
- NUCLEO-WB15CC [6]
- P-NUCLEO-WB55 USB dongle [7]
- P-NUCLEO-WB55 Nucleo [7] / NUCLEO-WB55RG [8]
- STM32WB5MM-DK [9]
| Platforms illustration |
|---|
More details about the board and other hardware requirement are available in the Bluetooth® LE SIG and 802.15.4 Nucleo pack user manual[10].
3. Build and install the application
This section describes the build process using IAR, Keil and STM32CubeIDE.
3.1. IAR IDE
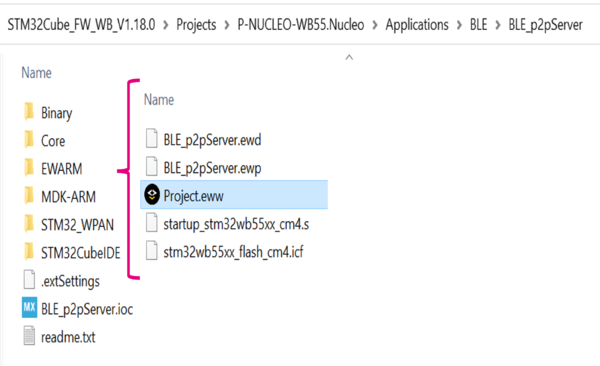
Select the application you want to build, open the IAR (EWARM) dedicated directory and launch the project.eww IAR file to open the demonstration project on IDE.
| IAR project directory |
|---|
|
|
Ensure your project is correctly visible into the Project Explorer view.
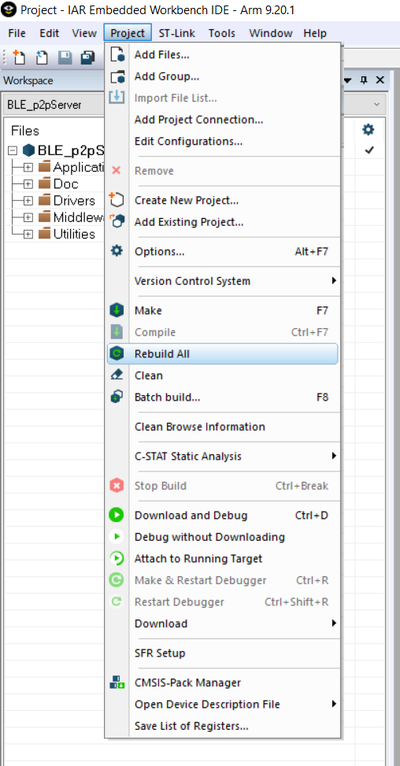
Build your project by reproducing the following steps:
| IAR: build |
|---|
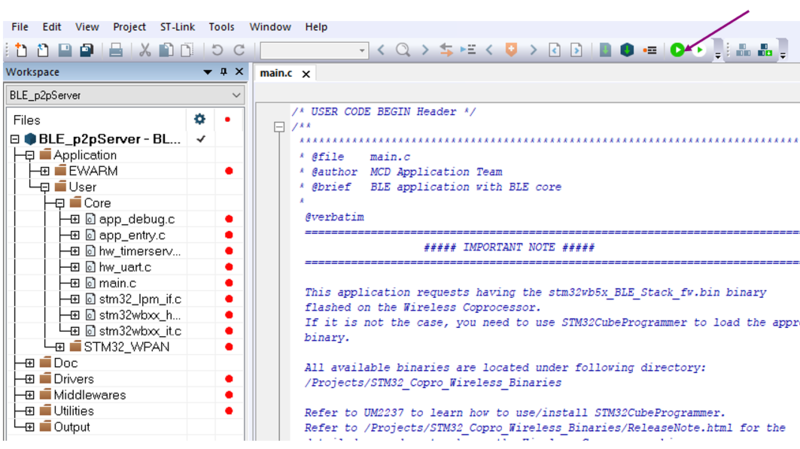
You can build and flash the project on your board by clicking on the button as illustrated below:
| IAR: build and flash |
|---|
3.2. Keil IDE
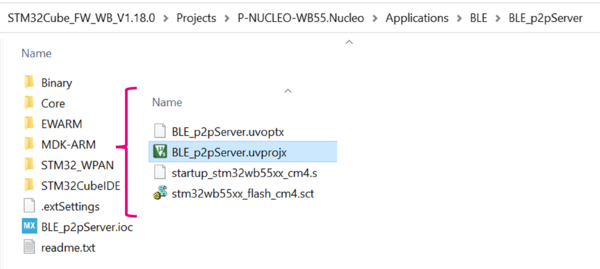
Select the application you want to build, open the Keil (MDK-ARM) dedicated directory and launch the .uvprojx file to open the demonstration project on IDE.
| Keil project directory |
|---|
Ensure your project is correctly visible into the Project Explorer view.
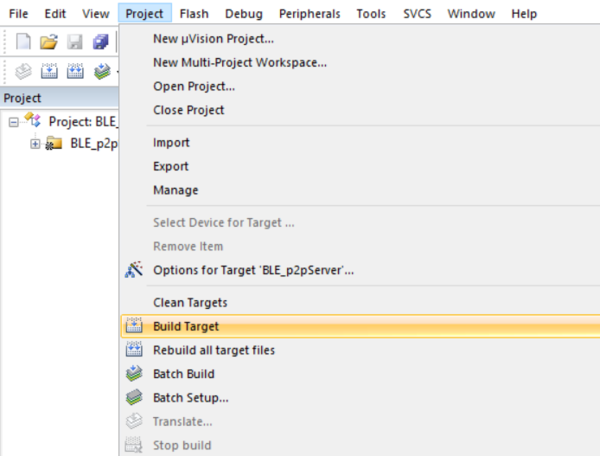
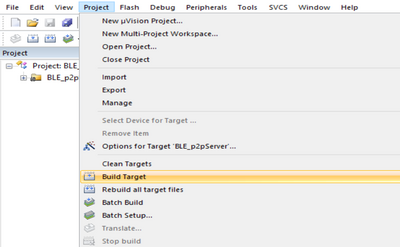
Build your project by reproducing the following steps:
| Keil: build |
|---|
You can flash the project and launch debug session on your board by clicking on the button as illustrated below:
| Keil: build and flash |
|---|
3.3. STM32CubeIDE
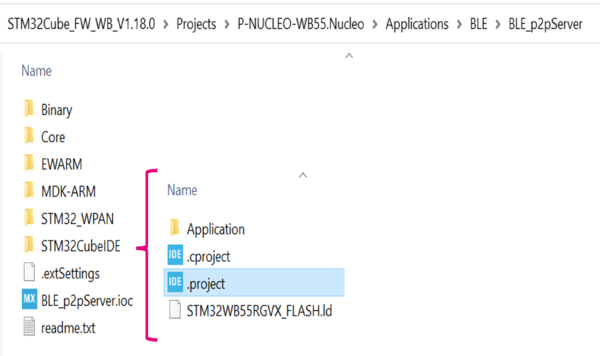
Select the application you want to build, open the STM32CubeIDE dedicated directory and launch the Cube IDE .project of the demonstration.
| STM32CubeIDE project folder |
|---|
Ensure your project is correctly visible into the Project Explorer view.
Build you project by reproducing the following steps:
| STM32CubeIDE: build |
|---|
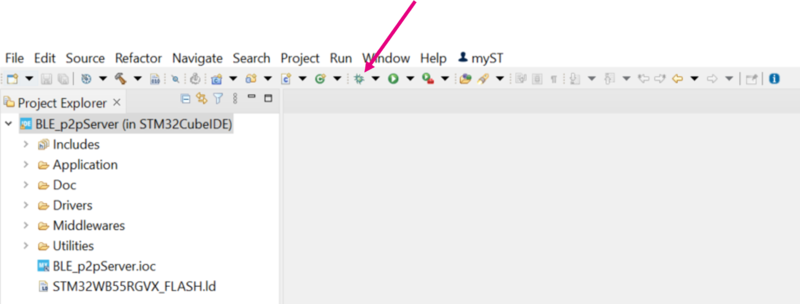
You can flash the project and launch debug session on your board by clicking on the button as illustrated below:
| STM32CubeIDE: flash |
|---|
3.4. Install the application from STM32CubeProgrammer
It is possible either to flash the previously build binary using STM32CubeProgrammer software[11].
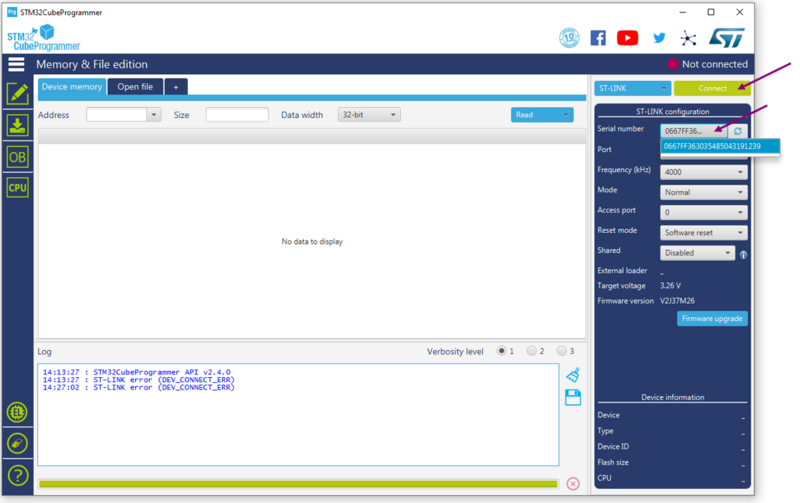
Select your device and connect to it:
| STM32CubeProgrammer: platform connection |
|---|
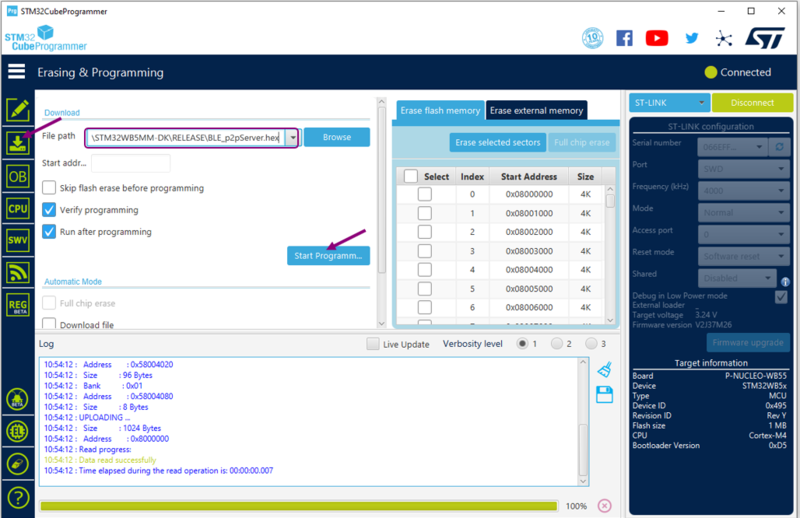
Once connected, the device information is displayed on Cube Programmer interface. Click on the programming icon, in the left column, and select the project binary to flash:
- STM32Cube_FW_WB_V[...]\Projects\[...]\Applications\BLE\BLE_p2pServer\[...]\ BLE_p2pServer.hex
Then, click ok Start Programming button:
| STM32CubeProgrammer: flash project |
|---|
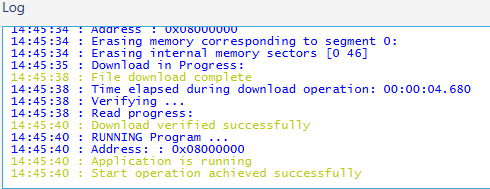
When the programming is complete the following logs are displayed:
| STM32CubeProgrammer: logs |
|---|
4. References
- ↑ STM32CubeWB MCU Package
- ↑ AN5289: Building wireless applications with STM32WB Series microcontrollers
- ↑ STM32CubeIDE
- ↑ STM32CubeProgrammer Software
- ↑ B-WB1M-WPAN1 board
- ↑ NUCLEO-WB15CC board
- ↑ 7.0 7.1 P-NUCLEO-WB55 board
- ↑ NUCLEO-WB55RG board
- ↑ STM32WB5MM-DK board
- ↑ UM2435 - Bluetooth® Low Energy and 802.15.4 Nucleo pack based on STM32WB Series microcontrollers
- ↑ STM32CubeProgrammer
