Literature
- Wiki articles:
- UM2237 STM32CubeProgrammer software description
- UM2238 STM32 trusted package creator (TPC) tool software description
- AN5054 Secure programming using STM32CubeProgrammer
Target description
The purpose of this article is to explain step by step how to use the debug authentication STM32CubeFW example provided by ST.
The user application flashed during the provisioning is the GPIO_IOToggle example from STM32CubeFW, installed in external memory.
Introduction
In this "getting started" a simple way to flash a user application in external memory and to provision the chip is shown based on the example provided in STM32CubeFW.
Through this practical example, you will learn:
- How to use the STM32CubeFW example, which is provided.
- How to configure the debug authentication for this example.
- What the device provisioning is and how to perform the setup of the device.
- How the user application is installed.
- How to perform a regression to retrieve an empty board.
Prerequisites
- Hardware
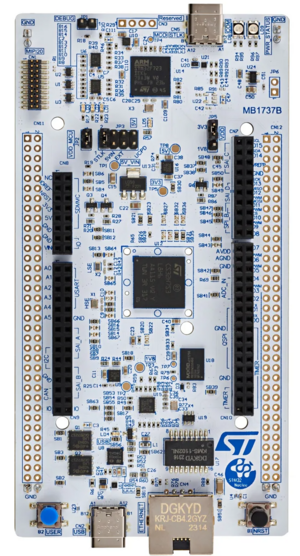
- NUCLEO-144 board NUCLEO-H7S3L8 board
- NUCLEO-144 board NUCLEO-H7S3L8 board
STM32H7S devices have all the available security features, including the hardware crypto accelerator.
The hardware cryptographic acceleration is not support for STM32H7R devices. It is possible to follow this step by step with a STM32H7R. The encryption must be disabled during the debug authentication configuration.
Required tools
- STM32Cube_FW_H7RS_V1.0.0 or later
- STM32CubeProgrammer v2.16.0 or more recent (with trusted package creator (TPC) selected at installation)
- IAR Embedded Workbench® rev 9.60 or later.
or IAR Embedded Workbench® rev 9.20.1 or later + IAR Patch EWARMv9_STM32H7R-Sxx_Vx.x.x**IAR patch is available in the STM32CubeFW: STM32Cube_FW_H7RS_Vx.x.x\Utilities\PC_Software - Tera Term / Putty or equivalent terminal emulator
- STM32Cube firmware
- Download the STM32Cube_FW_H7RS Cube firmware (advice is to place it close from the C: to avoid long Windows paths).
- A directory NUCLEO-H7S3L8 is included in "STM32Cube_FW_H7RS\Projects".
- Open the env.bat file.
- If the STM32CubeProgrammer has not been installed in the default folder: C:\Program Files\STMicroelectronics\STM32Cube\STM32CubeProgrammer, the customized installation path needs to be updated.
- Option bytes programming
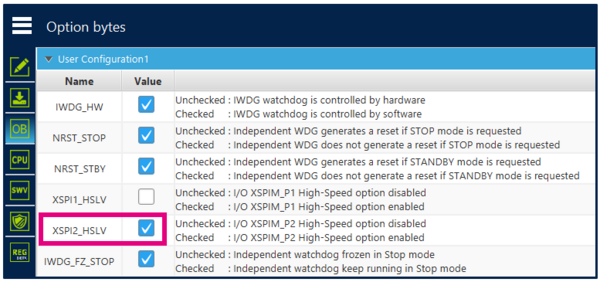
The STM32CubeFW example GPIO_IOToggle used in this step by step is running in external memory and it is necessary to configure the option byte XSPI2_HSLV to make it work:
- Open STM32CubeProgrammer.
- Connect the Nucleo board and configure the OB as follows:
- Apply the change and disconnect STM32CubeProgrammer.
1. Debug authentication configuration
This chapter explains how to start with the provisioning script.
It is used to configure the debug authentication.
1.1. Preliminary stage
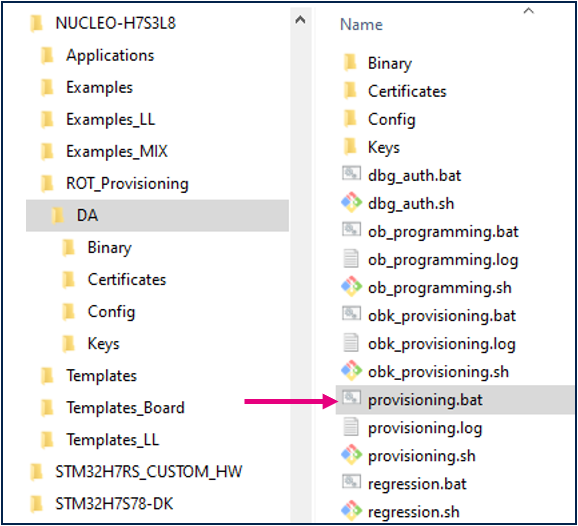
- The different steps to configure the DA are based on a script provided in the STM32CubeFW: Projects\NUCLEO-H7S3L8\ROT_Provisioning\DA\provisioning.bat.
- The following documentation is a guide through all the steps of this script, and explains how to perform each of them.
The figure below shows where the script is located in the STM32CubeFW.
- Launch the script: provisioning.bat (double-click) and keep it running during all the following steps.
- Type the product state: CLOSED (do not use LOCKED for this tutorial, this state is used only to set a final product state).
- Type the chosen Debug Authentication: CERTIFICATE (for explanation about certificate and password refer to intro article).
- Launch the script: provisioning.bat (double-click) and keep it running during all the following steps.
1.2. Debug authentication configuration
Press a key on the terminal window and the script guides you to perform the DA configuration:
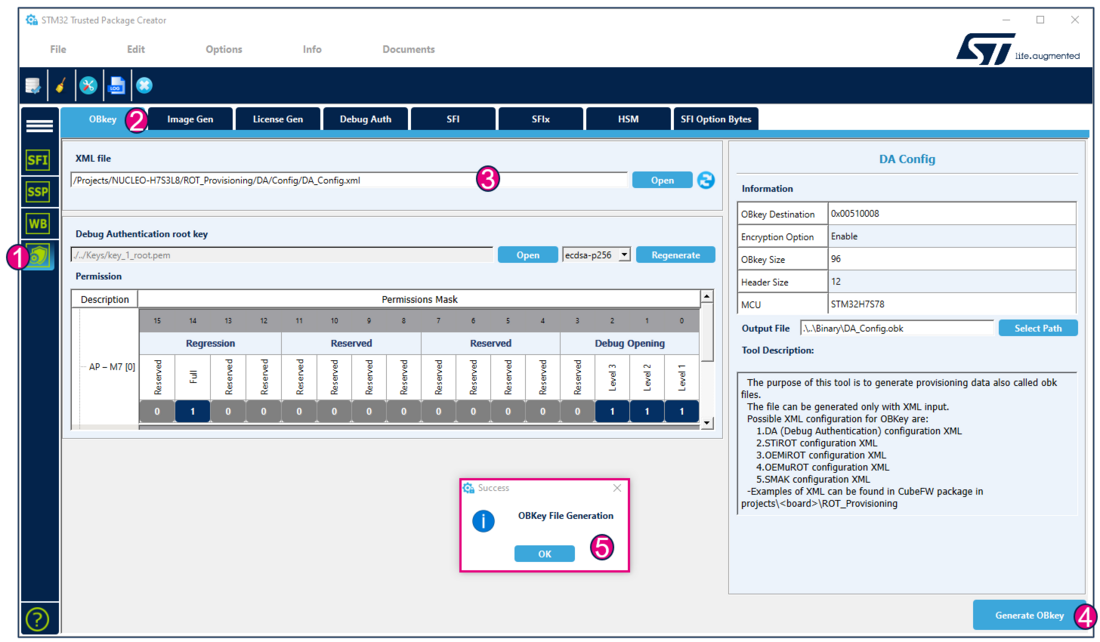
- Using STM32TrustedPackageCreator
For a commercial product, it is important to define your own key. But for trials it is advised to use the default provided, to avoid blocked regression due to a lost password.
According to the path specified in the DA_Config.xml, a DA_Config.obk file is generated in the Projects\NUCLEO-H7S3L8\ROT_Provisioning\DA\Binary folder. This file is used by the script during the provisioning step.
2. Provisioning
The step 2 corresponds to the provisioning of the OBKeys and the programming of the option bytes. This is automatically done by the script:
3. Images flashing
Next step is the programming of the images.
Check that the STM32H7RS IAR™ provided patch is correctly installed and check that your IAR Embedded Workbench® version is recent enough.
For this step by step, the 'GPIO_IOToggle code example is used. It is executed from external memory. It is available in STM32CubeFW: Projects\NUCLEO-H7S3L8\Examples\GPIO\GPIO_IOToggle\EWARM
- Open the project Project.eww.
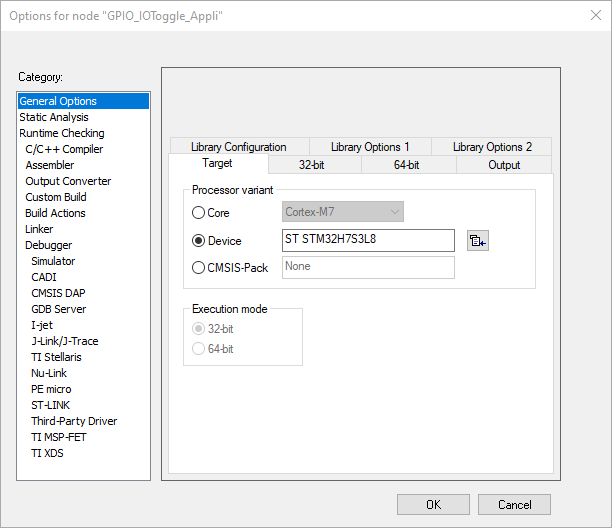
- In Project > Options > General Options > Target check that the device is recognized as below, otherwise check that the patch in Utilities\PC_Software is well installed.
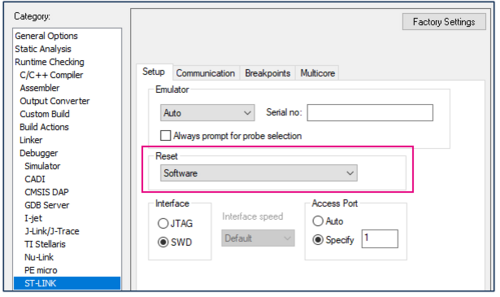
- In Project > Options > STLINK > Setup change the Reset mode to "Software".
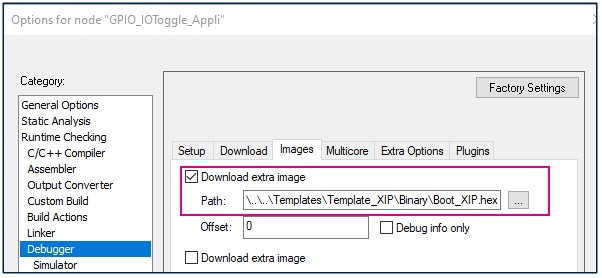
- This example is configured to download two images:
- The application image GPIO_IOToggle installed and executed in external memory.
- The image Boot_XIP.hex that allow the application image to be executed in external memory.
The parameters to download this extra image in flash are already configured in the IAR project in Project > Options > Debugger > Images :
- Validate the modification by clicking OK.
- Perform Project > Rebuid all, and once the build succeeds, select: Project > Download > Download active application
- The two images are flashed.
4. Setting the final product state and code execution
Press a key in the terminal window, the script sets the product state of the product to CLOSED and the code is executed.
You can see LEDs blinking on the Nucleo board.
5. Full regression
The product is now in closed state, but you can proceed to:
- A full regression to recover a virgin device.
Refer to Full regression using graphic interface or using the script provided in the STM32CubeFW
- A debug opening.
Refer to: OEMiRoT_Debug Opening
- Download a new firmware from closed state:
Refer to this article: OEMiRoT_ Download a new firmware from a closed device
