- Last edited one year ago ago
STM32WB Bluetooth® LE Mesh embedded provisioning application
1 Embedded provisioner introduction
Embedded provisioner is a proprietary solution to provision a Bluetooth® LE-Mesh network from a STM32WB platform instead of using a smartphone or tablet.
2 Requirements
Software and system requirements
The software required are the following (minimum IDEs version):
- IAR Embedded Workbench for ARM (EWARM) toolchain V8.20.2
- RealView Microcontroller Development Kit (MDK-ARM) toolchain V5.23
- STM32CubeIDE toolchain V1.7.0 [1]
Programmer:
- STM32CubeProgrammer[2]: to flash the board with an already generated binary
More information about software and system requirements are available in the ST Bluetooth® LE-Mesh Application Note[3].
Hardware requirements
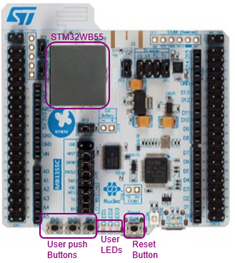
P-NUCLEO-WB55 Nucleo board[4] is necessary to set up the demonstration.
| STM32WB Nucleo board |
|---|
3 Setup
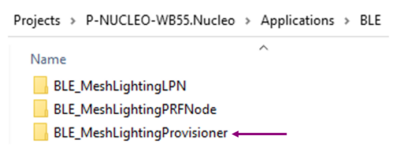
Embedded provisioner project can be found in STM32CubeWB MCU Package[5] at the following location.
| Embedded provisioner project directory |
|---|
To build and flash embedded provisioner project, process on the same way as for ST BLE-Mesh Proxy-Relay-Friend example.
Before building the project, choose between the two available configurations by modifying mesh_cfg_usr.h code as described below.
3.1 Embedded provisioner feature
With this setup, the provisioner node configures and initializes itself without action required from the user.
#define ENABLE_RELAY_FEATURE
#define ENABLE_PROXY_FEATURE
#define ENABLE_FRIEND_FEATURE
#define ENABLE_PROVISIONER_FEATURE
//#define DYNAMIC_PROVISIONER
[…]
#define ENABLE_SERIAL_PRVN                                                     1
3.2 Dynamic provisioner feature
With this setup, the provisioner node requires to be configured and initialized by the user. The configuration setup is described in the below sections.
#define ENABLE_RELAY_FEATURE
#define ENABLE_PROXY_FEATURE
#define ENABLE_FRIEND_FEATURE
//#define ENABLE_PROVISIONER_FEATURE
#define DYNAMIC_PROVISIONER
[…]
#define ENABLE_SERIAL_PRVN
For both setup, ensure that the serial commands are enabled, in order to pilot the provisioner from the terminal window.
/* Enables the serial interface using Uart */
#define ENABLE_SERIAL_INTERFACE                                                1
#define ENABLE_SIG_MODELS_AT_COMMANDS                                          1
#define ENABLE_VENDOR_MODELS_AT_COMMANDS                                       0
#define ENABLE_UT                                                              1
4 Getting started
Before following the steps described below, ensure that your project is setup to support the desired feature (embedded or dynamic provisioner) and flashed into the STM32WB platform.
Open a terminal to communicate with the platform. The terminal setup and use are described in ST Bluetooth® LE-Mesh Proxy-Relay-Friend example page.
If you build the provisioner application using ENABLE_PROVISIONER_FEATURE, you can skip step 1, as the board is automatically setup and initialized.
4.1 Step 1: starting provisioner node
In the case of DYNAMIC_PROVISIONER feature, logs on the terminal must display:
Unprovisioned device
NEXT NVM ADDRESS […]
BLE-Mesh Lighting Demo v1.[…]
BLE-Mesh Library v01.[…]
BD_MACAddress = […]
UUID Address = […]
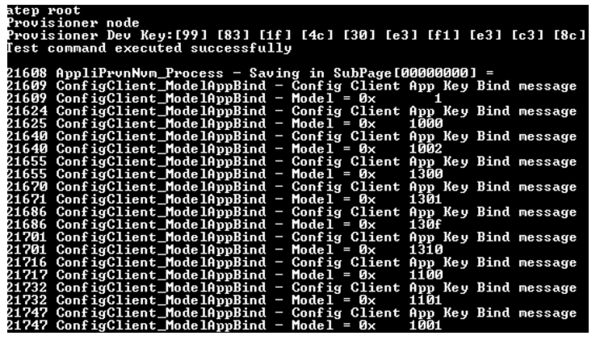
Write the below command on the serial terminal to create one node ROOT node for the network creation:
ATEP ROOT (case insensitive)
This command configures the provisioner and bind all the embedded models:
| Terminal logs: ATEP ROOT |
|---|
4.2 Step 2: scan unprovisioned devices
Write the below command on the serial terminal to scan unprovisioned devices in range:
ATEP SCAN (Case insensitive)
Log on terminal indicates unprovisioned devices with their corresponding UUIDs:
| Terminal logs: ATEP SCAN |
|---|
In the example above, two devices (device-0 and device-1) are not provisioned to the network.
4.3 Step 3: provision and configure devices
Write the below command to start provisioning of device-0:
ATEP PRVN-0 (Here 0 indicates the device–0)
Below Log displayed on the terminal indicates that the device-0 has been provisioned by the provisioner by creating the PB-Adv connection link:
Test command executed successfully
PB-ADV Link opened successfully
Device Key: […]
App Key: […]
Device is provisioned by provisioner
Log on provisioned node terminal indicates that the node is provisioned by the provisioner. Finally, the PB-Adv connection link is closed and device-0 is configured, and models bind.
| Terminal logs: node provisioned |
|---|
4.4 Step 4: provision other devices
To provision and configure new nodes, reproduce step 2 and step 3.
5 References


